Tuesday, May 13, 2008

Dulce de Leche Cheesecake Squares

When I started this blog it was so easy to keep up. I fell in love with baking instantly and the thought of baking just once a week seemed absurdly limiting. Yet here I am quite (well, incredibly) late for my update. It seems that I assumed that my personal matters wouldn't interfere with my baking but alas, they have.

At first I was sick four two weeks, and then after that it was dealing with the stress of finals and trying to keep up with my other work and the other things I needed to photograph. Honestly I've let things slow down here a bit more that I thought I ever would, but I have and I'm sorry.

With finals over and my life calming back down a bit, I'm ready to get back into the swing of things. Regular weekly posting and recipes, hopefully even a few pictures from my recent cake decorating class endeavors. Summer term starts for me but I don't expect that it will be too hectic.

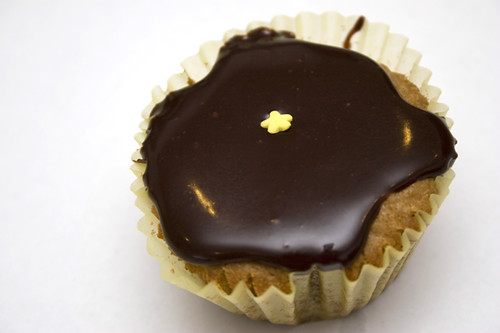
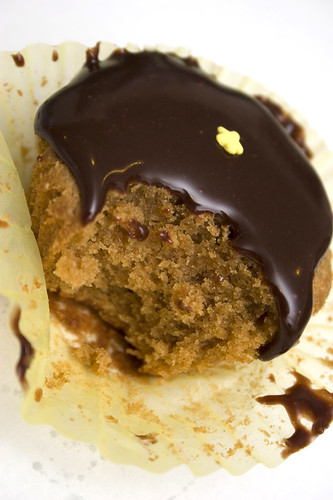
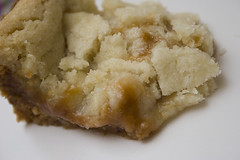
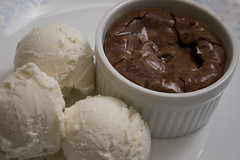
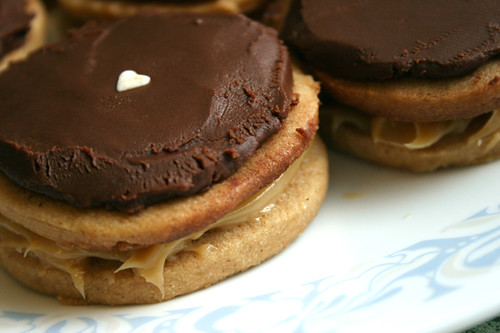
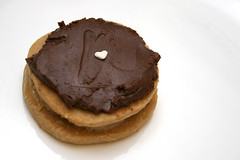
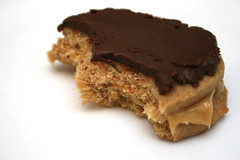
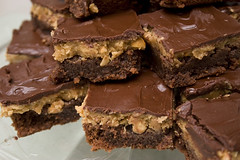
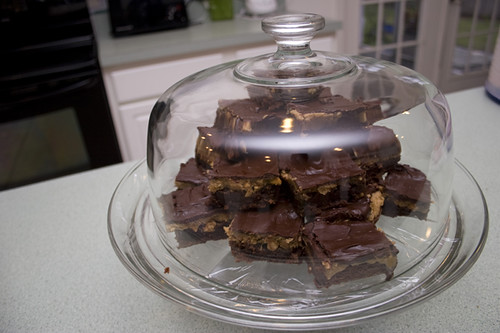
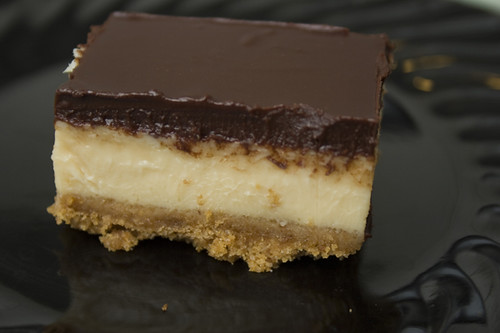
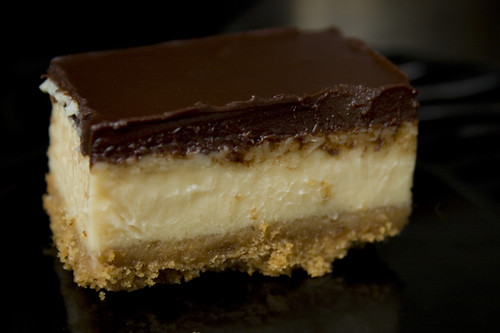
Without further ado, I present to you one of my recent favorite recipes. Dulce de Leche Cheesecake Squares!


Individual square

Now I've never made cheesecake before so I was a little afraid of how I would do, but it ended up being surprisingly easy. Honestly my biggest problem was not letting the cream cheese come to room temperature which made it chunky and made for a lot of extra mixing time. I found the recipe at Smitten Kitchen, a site that I love and model my own layout after in some ways.

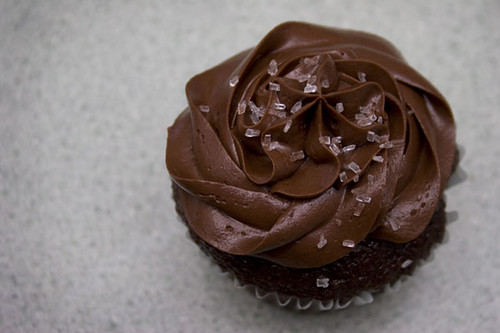
The recipe itself called to me instantly. I used Dulce de Leche  in some cookies I made previously and fell in love with the stuff from that point on. Plus the Cheesecake Factory has a Dulce de Leche cheesecake that I absolutely adore and order every time I am there. That, and I am always tantalized by chocolate on anything, and a whole layer of it on my cheesecake squares sounded delicious.

Sweetened Condensed Milk Dulce de Leche in the making
Chocolate chips and butter Melting

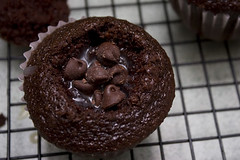
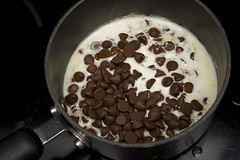
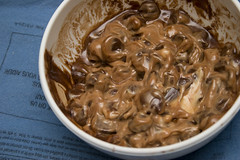
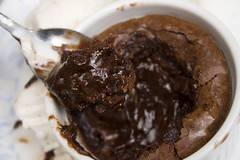
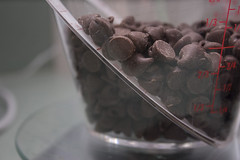
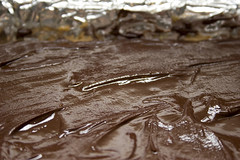
The only problem taste wise I had with the recipe at all was entirely my fault. As I said, I love chocolate, but sometimes I go a bit overboard. I added a bit more chips than the recipe called for which made the layer of chocolate a little thicker than I liked. At times it overpowered the Dulce de Leche taste which wasn't very strong to begin with, but it wasn't a horrible mistake since, heck, it's chocolate.

layering Hardened

I was very impressed with how simple and easy this recipe was despite how intimidated I had been feeling. It makes me want to try for other cheesecake varieties as well, maybe something fruity. It's nice to finally overcome a baking obstacle that I had been avoiding and I really think it's opened up new avenues in the dessert realm for me.

Individual square II


The original recipe is located here.


Dulce de Leche Cheesecake Squares
Time: 9 3/4 hr (includes chilling) (45 minutes active time)
Makes 64 (1-inch) petits fours


For crust
3 1/2 oz graham crackers, crumbled (1cup)
2 tablespoons sugar
3 tablespoons unsalted butter, melted

For filling
1 teaspoon unflavored gelatin (from a 1/4-oz envelope, will just about half of envelope)
1/4 cup whole milk
8 oz cream cheese, softened
2 large eggs
3/8 teaspoon salt
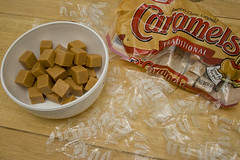
1 cup dulce de leche (12 1/2 oz) (recipe follows)

For glaze
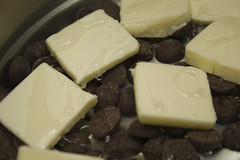
3 oz fine-quality bittersweet chocolate (not unsweetened), coarsely chopped
1/2 stick (1/4 cup) unsalted butter, cut into pieces
2 teaspoons light corn syrup

Make crust: Put oven rack in middle position and preheat oven to 325°F. Line bottom and sides of an 8-inch square baking pan with 2 sheets of foil (crisscrossed), leaving a 2-inch overhang on all sides.

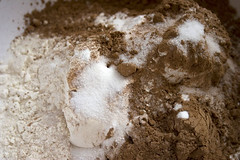
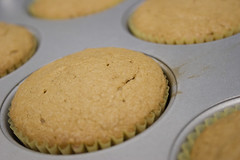
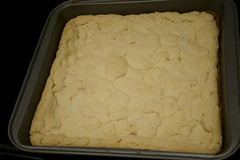
Finely grind crackers with sugar and a pinch of salt in a food processor. With motor running, add butter, blending until combined. Press mixture evenly onto bottom of baking pan. Bake 10 minutes, then cool in pan on a rack 5 minutes.

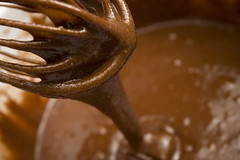
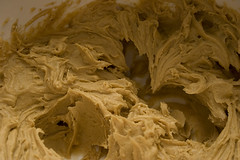
Make filling: Sprinkle gelatin over milk in a small bowl and let stand 2 minutes to soften. Beat together cream cheese, eggs, salt, and gelatin mixture in a bowl with an electric mixer at medium speed until well combined, about 2 minutes, then stir in dulce de leche gently but thoroughly. Pour filling over crust, smoothing top, then bake in a hot water bath (I was able to fit mine in a 9×13-inch baking pan) in oven until center is just set, about 45 minutes. Cool cheesecake completely in pan on rack, about 2 hours. Chill, covered, at least 6 hours.

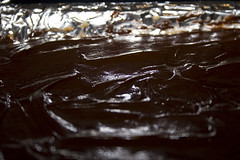
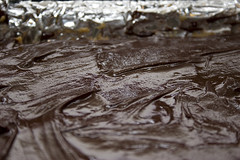
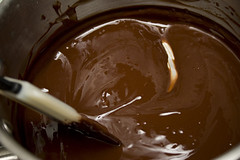
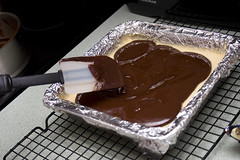
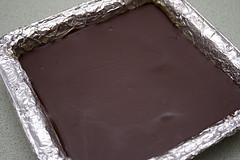
Glaze cake within 2 hours of serving: Heat all glaze ingredients in a double boiler or a small metal bowl set over a saucepan of barely simmering water, stirring until smooth, then pour over cheesecake, tilting baking pan to coat top evenly. Chill, uncovered, 30 minutes.

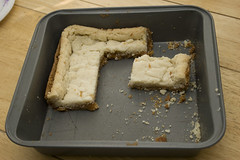
Lift cheesecake from pan using foil overhang and cut into 1-inch squares with a thin knife, wiping off knife after each cut. (Don’t skip this step! A clean knife is essential for uber-neat squares.)

Note: Cheesecake (without glaze) can be chilled up to 3 days.

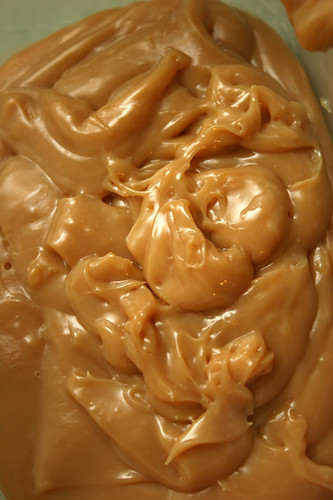
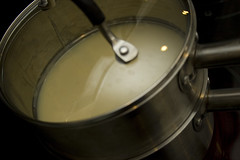
Dulce de Leche (Milk Caramel)

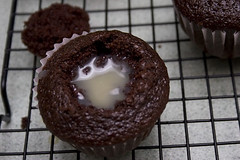
Pour 1 can (14 oz.) sweetened condensed milk into top of double-boiler pan; cover. Place over boiling water. Cook over low heat, stirring occasionally, for 40 to 50 minutes, or until thick and light caramel-colored.

Remove from heat. Whisk until smooth.

Thursday, April 24, 2008

Status update

I'm sorry I've pretty much disappeared!  I'm incredibly sick right now and have been for most of the week. And honestly, no one want's to eat food that a sick person made so I haven't been doing any baking.

Very soon though I will have cheesecake to show you and then hopefully some new cupcakes. Sorry about the delay!

Monday, April 14, 2008

Hershey's Chocolate Caramel Cupcakes

Delicious

That's right. Another recipe inspired by Never Bashful With Butter. That woman is my ultimate hero. I have never cooked any one of her recipes or recommended recipes without absolutely loving it. In fact, not far from now I'll be posting about her amazing sugar cookies that I make every holiday these days.
The recipe itself actually comes from the Hershey's website and also here's a link to NBWB's original post on it since I used her recipe for the caramel (which I totally ruined, but we'll get to that later).

Finished cupcake

Technically I was making these cupcakes for my cousin who had just turned seventeen. I was running a bit late but his only real request was "Chocolate". I honestly couldn't get any more out of him then grunts, but what do you expect from a seventeen year old boy? I figured it wouldn't be too hard to find a recipe for a simple chocolate cupcake, but I wanted one with a little bit more to it than chocolate. I wanted something that would make it stand out but not be too time consuming. I definitely found that in this recipe. Also I'm not above saying that I think I'm getting better at speeding up my cooking these days. I tend to lose a lot of time in the checking, double checking, and triple checking. Let's just say I've managed to achieve a reputation in my family for reading recipes wrong and I've been working hard to turn that around.

Ingredients Mixing together

I've filled cupcakes before, but every time I'm going to do it I get nervous for some strange reason. Like I'm going to accidentally cut the cupcake in half or something ridiculous. Luckily enough that didn't happen. I do however wish that I had had a bit more luck with the filling. I've never tried to make caramel before so I know it's totally my fault, but I just could not make stuff thicken. Alas, I loaded up the cupcakes anyways. One layer caramel and one layer chocolate chips. Muffin uses chocolate shavings and I regret not doing the same. Not only was the caramel not thick enough to be noticed easily, but the chocolate chips didn't fully melt in the warm cupcake and managed to overpower the caramel. Oh and I also want to mention that if you've never filled cupcakes before, it's simple. Just take a small knife and cut a a cone shape out of the top of the cupcake. Fill the cupcake and then cut off the tip of the cone so that it doesn't sit above the cupcake and look funny :)

Opening the cupcake Filly A few chocolate chips on top

When I brought brad his 12, he scarfed one down in absolutely no time at all. However, his pleasant sounding grunts weren't really a for sure for sure indicator of whether or not they were good. I had two that I really liked, but honestly I can't remember the taste anymore. After the second one I was just so put off of chocolate. I'd been eating a lot of it for the past week or so in bar and kiss form so the cupcakes were overkill for me. However my mom must have eaten like five of them, she thought they were amazing.

Iced

Well I'm sure you're done drooling now, so if you want you can make them for yourself. Again the recipe is from the Hershey's website


Hershey's Chocolate Caramel Cupcakes
Makes about 30 cupcakes

2 cups sugar
1-3/4 cups all-purpose flour
3/4 cup HERSHEY'S Cocoa
1-1/2 teaspoons baking powder
1-1/2 teaspoons baking soda
1 teaspoon salt
2 eggs
1 cup milk
1/2 cup vegetable oil
2 teaspoons vanilla extract
1 cup boiling water

Stir together sugar, flour, cocoa, baking powder, baking soda and salt in large bowl. Add eggs, milk, oil and vanilla; beat on medium speed of mixer 2 minutes. Stir in boiling water (batter will be thin). Pour batter into prepared pans.

CUPCAKES: Line muffin cups (2-1/2 inches in diameter) with paper bake cups. Heat oven to 350°F. Fill cups 2/3 full with batter. Bake 22 to 25 minutes. Cool completely. Frost.

Hershey's Perfectly Chocolate Frosting
(I used two batches to frost all my cupcakes generously)

1 stick (1/2 cup) butter or margarine
2/3 cup HERSHEY'S Cocoa
3 cups powdered sugar
1/3 cup milk
1 teaspoon vanilla extract

Melt butter. Stir in cocoa. Alternately add powdered sugar and milk, beating to spreading consistency. Add small amount additional milk, if needed. Stir in vanilla. About 2 cups frosting.

Never Bashful With Butter's easy Caramel recipe

1 Cup heavy cream
1/4 cup butter
1/2 cup sugar
3 teaspoons vanilla

In the pan you'll place the butter, half of the cream and half of the sugar. bring mixture to a boil. When the mixture begins to thicken slightly, add the remaining sugar. bring to a full boil. when the mixture starts to thicken and turn a light brown colour, add the remaining cream and sugar.

turn temperature down to a few notches below medium. The mixture should remain boiling. stir constantly and do not allow the bottom to scorch. keep stirring and heating for about 10 minutes. when the mixture starts thickening up like pudding, remove from heat.

Let cool about 5 minutes (caramel will still be hot) or until the cupcakes are out of the oven.

Thursday, April 10, 2008

Peanut Butter Cupcakes with Chocolate Glaze

Well I know I'm a tad late, but I finally got these pictures uploaded off my camera. I've been awfully busy with photo projects for college but who doesn't have time for cupcakes? Especially when they look like this.


Peanut Butter Cupcake with Chocolate Glaze :)


When it comes to flavor combination, peanut butter and chocolate is something that I can't resist. Whenever I see a recipe that combines the two, I have to just tell myself to resist, that I need to try a new flavor. Well this time I couldn't.


Mmmm Peanut butter Melting Chocolate


This is going to sound really silly, but I've never actually heard of a peanut butter cupcakes. I just haven't ever conceptualized peanut butter in cake form before, so when I stumbled across this recipe in Elinor Klivans book Cupcakes!, I just had to make them.


Mixing Adding the egg
Finished Batter Finished cupcakes


My dad scoffed at the idea and asked me why I had to ruin perfectly good cupcakes with peanut butter. I just told him that he was going to regret making fun of them when they were done and delicious and he couldn't have any. However, when they were finished and amazing I wanted to show them off so I went back on my word and let him have one and he apologized :)


Mmm The first bite

I think if I made them again though, I might actually fill them with chocolate. I was in such a rush to try one that I poured the chocolate on before it was done cooling, so I couldn't really get much on without it dripping of the edges of the liner. I think filling the cupcakes with just a bit of chocolate and having a thin layer on top would really balance out the peanut butter flavor a bit better.


And without further ado, here is the recipe :)

Peanut Butter with Chocolate Glaze Cupcakes
Recipe by Elinor Klivans from her book Cupcakes!
Makes 12 cupcakes

INGREDIENTS
For cupcakes

1 cup all purpose flour
1 tsp baking powder
1/4 tsp salt
6 tbsp (3/4 stick) unsalted butter, softened
3/4 cup smooth peanut butter, room temp
1 cup brown sugar
1 egg
1 tsp vanilla extract
1/2 cup milk

For chocolate glaze
1/4 heavy whipping cream
1 tbsp unsalted butter
1 cup milk chocolate chips
1/2 tsp vanilla extract

INSTRUCTIONS
To make cupcakes
Preheat oven to 350F. Line muffin tin cupcs with paper cupcake liners
Sift flour, baking powder and salt into a medium bowl and set aside

In a large bowl, using an electric mixer on medium speed, beat the butter, peanut butter and brown sugar until smoothly blended and lightened in color, about 1 minute. Stop the mixer and scrape down the sides of the bowl as needed during mixing. Mix in egg. Add vanilla and beat for 1 minute or until batter smooth.

On low speed, add the flour mixture in 3 additions and the milk in 2 additions, beginning and ending with the flour mixture and mixing until the flour is incorporated and the batter looks smooth.

Fill each liner with a generous 1/4 cup of batter, to about 1/3 inch below the top of the liner. Bake just until the tops feel firm and are lightly browned and a toothpic inserted in the center comes out clean, about 22 minutes. There will be cracks on the top. Cool cupcakes for 10 minutes in the pan on wire rack.

To make chocolate glaze
In a medium saucepan, heat the cream and butter over low heat until the cream is hot adn the butter has melted. The mixture should form tiny bubbles and measure about 175F on a thermometer; do not let it boil.

Remove the pan from the heat, add the milk chocolate and let it sit in the hot cream for 30 secs to soften. Add the vanilla and whisk the glaze until it is smooth and all the chocolate has melted. (Return the glaze to low heat if necessary to melt the chocolate completely, whisking constantly.) The glaze should be thick enough to hold its shape when spread over the cupcakes. If it is too liquid to spread, let it sit at room temp for 5-15 minutes, depending on the temp of your kitchen.

Using a small spatula, spread 1 tbsp of glaze over the top of each cupcake.

Wednesday, April 2, 2008

Gooey Caramel Butter Bars

So as soon as burnt sugar was mentioned as a topic in the LiveJournal community BakeBakeBake I had the perfect recipe in mind. Unfortunately I had loads of school work plus lots of cooking for easter standing in my way.

I did remember to make the recipe though and even though I ended up submitting it on the day of, that certainly can't take away from how delicious it was. I'm not even kidding, look at these things:

more gooey goodness :)

That's a fresh one before it had fully set sitting on top of a melted caramel candy :) After they did set though, I tended to heat mine up for about 10 seconds in the microwave to get the caramel nice and melty again.

Caramel candies closeup

I had to unwrap quite a few Caramel Candies but it was worth it. Plus they looked even more delicious once I melted them:

melting


They don't look like they have a lot of carmel in them from the side view, but they definitely do :)

Cookie bar slice Cookie bar slice

I actually only baked a half batch that night and the next morning they were almost gone!! I don't even know when my parents found the time to eat them but apparently they did

cooked What was left


The recipe is originally from Jill O'Connor's Sticky, Chewy, Messy, Gooey, but I followed it here on taste and tell: http://workingwomanfood.blogspot.com/2007/12/gooey-caramel-butter-bars.html

Wednesday, March 26, 2008

Chocolate Pots

These were SO easy to make. Nigella made them on her show in like 5 minutes (minus cooking time) so I figured it wouldn't be too tough to do the same. I halved her recipe though because it was just me and my mother :)

She called them "ChocoHotoPots" because that's what her son called them, but I think that's kind of silly so I think I'm going to stick to the title "Chocolate Pots"


Chocolate and butter melting Chocolate in ramekins
Chocolate pots and icecream Chocohotopots gooey center


They were pretty delicious but next time I think I'll use semi sweet chocolate (the recipe called for dark) because they were almost too rich. They were still quite yummy though.


Recipe (makes 4 - 6 servings)

Ingredients:
Butter for ramekins
3/4 cup semisweet chocolate chips
1 stick (4 ounces) unsalted butter
2 large eggs
3/4 cup superfine sugar
3 tablespoons all-purpose flour
1/2 cup chocolate chips

Directions:
1. Place baking sheet in an oven preheated to 400°F/200°C. Butter four 2/3-cup ramekins and set aside. I actually find these so decadently sweet, that I use ½ cup ramekins and make 6.

2. Using a microwave oven or double boiler, melt together the semisweet chocolate and the butter. Set aside to cool.

3. In a separate bowl, combine eggs, sugar and flour. Add cooled chocolate mixture, and mix until blended. Fold in chocolate chips.

4. Divide mixture evenly among ramekins and place on baking sheet. Bake until tops are shiny and cracked and chocolate beneath is hot and gooey, about 20 minutes. Place each ramekin on a small plate with a teaspoon and serve, reminding children that ramekins and chocolate are hot.

Monday, March 17, 2008

Brown Sugar Buttersnap cookies with Dulce De Leche filling

Never Bashful With Butter is probably one of my favorite food blogs, hands down. I've fawned over the recipes on that site for so long and I just finally decided to take it upon myself to make something I've seen. Let's just say I'm so glad I did.

Side view

I've never made Dulce de leche before and I'm much too unlucky to try the in can method, so I just used a double boiler for the condensed milk. It took about an hour and a half, and I'm not sure that it got dark enough, but it certainly tasted wonderful. Honestly though, I didn't like it much on it's own. The cookie caramel chocolate combo was the real knockout.

Dulce De Leche

I was so excited about this recipe that I put together one cookie, took a picture, and then took a few bites. They were really that good. They definitely called for a glass of milk though. Like I'm not even kidding, I'd feed one to my family member and they'd make yummy food noises and attempt to pantomime drinking in order to get me to pour them some milk. They were rather delicious with or without it though :)

Whole Cookie The first Bite


Honestly as soon as I made the dough I knew these were going to be amazing. The butter flavoring seemed strange to me at first because I'd never thought of even using butter flavoring before, but it really did make the difference. The cookies would have been a hit on their own but nothing tops the sandwich version.

Recipe from Never Bashful With Butter

Sunday, March 9, 2008

Cookies n' Cream Cupcakes

Cookie's and Cream Cupcake Cookie's and Cream Cupcakes before frosting


These babies have oreo's baked right into them then sprinkled all over top. I only made a half batch but they all got eaten in no time.

Cookie's and Cream Cupcake 2


Overall they were really good, but a bit denser than I'd expected. I think the next time I want to make Cookie's and Cream cupcakes I'll probably just add cookies to an already tried and true yellow cupcake recipe, but they were definitely still very good :)

RECIPE
for the cupcakes:
» 1 cup (2 sticks) sweet butter, softened
» 1 cup superfine sugar
» 2 cups self-rising flour
» 1 tsp. baking powder
» 4 eggs
» 1 tsp. vanilla extract
» 10 crushed cream-filled chocolate cookies (I used Oreos)

for the frosting:
» 3 cups confectioners' sugar, sifted
» 1 cup (2 sticks) sweet butter, softened
» pinch of salt
» 10 crushed cream-filled chocolate cookies

Preheat the oven to 350 degrees Fahrenheit (175 degrees Celsius). Place 18 foil or paper baking cups in muffin pans. Combine all the cupcake ingredients except the cookies in a large bowl. Beat with an electric mixer until smooth and pale - about 2-3 minutes. Stir in crushed cookies.

Spoon the batter into the cups and bake for 20 minutes. Remove pans from oven and cool for 5 minutes. Then remove the cupcakes and cool on a wire rack.

To make the frosting, beat the confectioners' sugar, butter, and salt using an electric mixer. Spread the frosting onto the cupcakes and sprinkle the crushed cookies on top.

Store unfrosted in an airtight container for up to 3 days or freeze for up to 3 months.

Makes about 1 and a half dozen.

Tuesday, March 4, 2008

Peanut Butter Brownies

I honestly can't think of anything that can top the love I consistently feel for the flavor combination of peanut butter and chocolate. I'm not sure that I've ever been more sure of that until today though. When I saw this recipe I figures I'd give it a shot, but little did I know how outstanding it was.

Now I'm new to the world of baking and I have quite a reputation for ruining recipes. Mostly I just don't read as closely or thoroughly as I should. Well I managed to mess up on the first batch of these as well, tood thing I know myself well enough to buy extra ingredients, otherwise these brownies wouldn't currently exist. I wasted 10 oz of chocolate by adding a tablespoon and a half of vanilla extract instead of a teaspoon and a half. I know, I'm amazing.


Chocolate chips! Good mix 3
Peanut butter layer 2 Close up


my only complaints were that they ended up slightly on the fudgey side, and that I added a bit to much nutmeg. Other than that they were perfect. I've never made brownies from scratch in my life and I don't think I'll ever use a box again.


Light test 1 Light test 2 Light test 3


I also got to use this as an opportunity to work on my food photography. It was very interesting just to see how the slightest change in angle or position of the flash would dramatically alter an image. I really learned a lot from it and that totally made it twice as worth it.

If you want to see more you can always go to my Flickr. Unfortunately I need to get a pro account to have more sets which I didn't know until just now :( Oh well, here's to delicious looking brownies!


Brownies encased 3

The recipe is one I found on here on Epicurious